
Recipe Overview
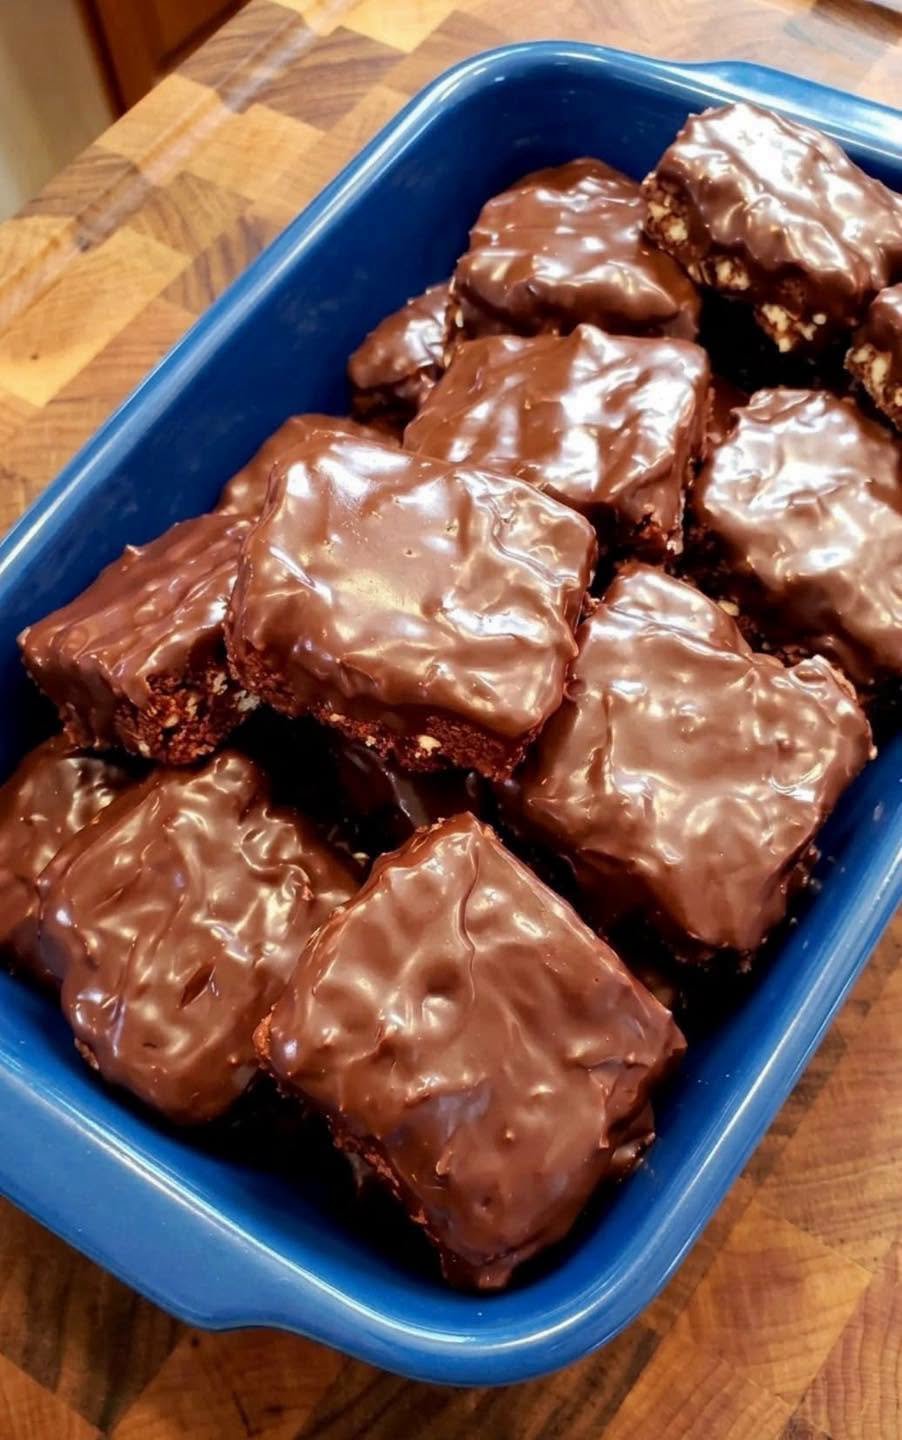
Chocolate-Covered Brownie Bars are a rich, fudgy dessert made with a soft, chocolate-packed brownie base covered in a smooth layer of melted chocolate. Each bar has a dense, moist center, slightly chewy edges, and a crisp chocolate coating that creates the perfect contrast of textures.
These homemade brownie bars are ideal for chocolate lovers, bake sales, birthday parties, holiday dessert platters, family gatherings, and sweet treats to enjoy with coffee or milk.
The secret to the best brownie bars is using the right balance of butter, chocolate, sugar, and flour, avoiding overbaking, and allowing the brownies to cool completely before adding the chocolate coating.
-
Preparation Time: 20 minutes
-
Cooking Time: 25–32 minutes
-
Cooling Time: 1–2 hours
-
Total Time: Approximately 2 hours
-
Servings: 12 bars
-
Difficulty: Easy to moderate
-
Cuisine: American-inspired dessert
-
Cooking Method: Oven-baked
-
Texture: Fudgy, chewy, soft, and chocolate-coated
-
Flavor: Deep chocolate with a rich, sweet finish
2. Ingredients
For the brownie base
-
115 g unsalted butter
-
150 g granulated sugar
-
50 g light brown sugar
-
2 large eggs, at room temperature
-
1 teaspoon vanilla extract
-
75 g all-purpose flour
-
35 g unsweetened cocoa powder
-
100 g semisweet chocolate, melted
-
¼ teaspoon salt
-
½ teaspoon instant coffee powder, optional
For the chocolate coating
-
250 g semisweet or milk chocolate, chopped
-
1 tablespoon coconut oil or neutral vegetable oil
Optional toppings
-
Flaky sea salt
-
White chocolate drizzle
-
Chopped toasted almonds
-
Crushed chocolate cookies
-
Mini chocolate chips
Ingredient tip: Use good-quality chocolate with a cocoa content of approximately 50–60% for a balanced coating. Milk chocolate creates a sweeter finish, while dark chocolate produces a richer, less sweet result.
3. Step-by-Step Instructions
Step 1: Prepare the oven and baking pan
Preheat your oven to 175°C (350°F).
Line an 8 × 8-inch (20 × 20 cm) square baking pan with parchment paper, leaving a little overhang on two sides. This will make it easier to lift the brownies out after baking.
Lightly grease the parchment paper if needed.
Step 2: Melt the butter and chocolate
Place the butter and 100 g of semisweet chocolate in a heatproof bowl.
Melt them together using either of these methods:
-
Microwave: Heat in 20-second intervals, stirring after each interval.
-
Double boiler: Place the bowl over a saucepan of gently simmering water, making sure the bottom of the bowl does not touch the water.
Stir until smooth and glossy. Allow the mixture to cool for approximately 5 minutes before adding the eggs.
Step 3: Combine the sugars
Add the granulated sugar and brown sugar to the melted chocolate and butter.
Whisk until the mixture is evenly combined.
The granulated sugar helps create a delicate brownie crust, while the brown sugar contributes moisture and a chewy texture.
Step 4: Add the eggs and vanilla
Add the eggs one at a time, whisking well after each addition.
Stir in the vanilla extract.
Whisk for approximately 1–2 minutes until the mixture becomes thick, smooth, and glossy.
Avoid adding the eggs while the chocolate mixture is extremely hot, as this could cause them to cook prematurely.
Step 5: Mix the dry ingredients
In a separate bowl, combine the flour, cocoa powder, salt, and optional instant coffee powder.
Sift the flour and cocoa powder if they contain lumps.
Gradually add the dry ingredients to the chocolate mixture.
Fold gently with a spatula until no dry streaks remain. Do not overmix, as excessive mixing can make the brownies more cake-like.
Step 6: Transfer the batter to the pan
Pour the brownie batter into the prepared pan.
Spread it evenly into the corners using a spatula.
Tap the pan lightly against the counter to release any large air pockets.
The batter should be thick and glossy.
Step 7: Bake the brownies
Place the pan in the preheated oven and bake for approximately 25–32 minutes.
Start checking at 25 minutes. Insert a toothpick into the center:
-
A few moist crumbs indicate fudgy brownies.
-
Wet batter means the brownies need more time.
-
A completely clean toothpick may indicate that the brownies are becoming more cake-like.
The edges should be set, while the center should remain slightly soft.
Avoid overbaking because the brownies will continue to firm up as they cool.
Step 8: Cool completely
Remove the pan from the oven and place it on a cooling rack.
Allow the brownies to cool in the pan for approximately 30–45 minutes, then lift them out using the parchment paper.
Let them cool completely before cutting or coating. For cleaner cuts and easier handling, refrigerate the brownie slab for 30–45 minutes.
Step 9: Cut into bars
Place the cooled brownie slab on a cutting board.
Using a sharp knife, cut it into 12 rectangular bars.
For neat edges, wipe the knife with a warm, damp cloth between cuts and dry it before cutting again.
If the brownies are very soft, chill them a little longer before cutting.
Step 10: Prepare the chocolate coating
Place the 250 g of chopped chocolate in a heatproof bowl.
Add the coconut oil or neutral vegetable oil.
Melt the mixture using short microwave intervals or a double boiler, stirring frequently until smooth.
Allow it to cool slightly so it is fluid but not extremely hot.
The oil helps the coating flow smoothly and creates a thinner shell. It is optional if you prefer a thicker chocolate layer.
Step 11: Coat the brownie bars
Place a wire rack over a parchment-lined tray.
Dip each brownie bar into the melted chocolate, using two forks to turn it carefully and coat the sides.
Lift the bar out and allow excess chocolate to drip back into the bowl.
Place the coated bar on the wire rack or parchment-lined tray.
Alternatively, place the bars on the rack and spoon melted chocolate over each one, allowing the excess to drip off.
Step 12: Decorate the bars
While the chocolate coating is still wet, add any desired toppings.
Try a small pinch of flaky sea salt, chopped nuts, or a drizzle of contrasting white chocolate.
Keep toppings light so the chocolate coating remains the star of the dessert.
Step 13: Allow the coating to set
Place the coated brownie bars in the refrigerator for approximately 20–30 minutes, or until the chocolate is firm.
If your kitchen is cool, the coating may also set at room temperature, although this can take longer.
For the neatest presentation, allow the coating to harden fully before stacking or packaging the bars.
Step 14: Serve and enjoy
Arrange the finished bars on a serving platter.
Allow refrigerated bars to sit at room temperature for 5–10 minutes before serving for the best brownie texture.
Enjoy them on their own or alongside a glass of milk, coffee, or tea.
4. Taste and Texture
Chocolate flavor: Deep, rich, and satisfying, with chocolate in both the brownie base and the coating.
Brownie center: Dense, moist, and fudgy rather than airy or cake-like.
Edges: Slightly chewy and firm.
Chocolate coating: Smooth and crisp when chilled, with a pleasant snap depending on the chocolate used.
Sweetness: Adjustable through your choice of dark, semisweet, or milk chocolate.
Overall result: A bakery-style brownie bar with a soft chocolate center and a rich outer shell.
5. Tips for Perfect Fudgy Brownies
-
Measure the flour and cocoa powder accurately. Too much flour can make brownies dry.
-
Use melted chocolate in addition to cocoa powder for deeper flavor.
-
Whisk the eggs and sugar well, but fold in the flour gently.
-
Do not overbake. A few moist crumbs on the toothpick are ideal.
-
Allow the brownies to cool fully before coating them.
-
Chill the slab before cutting if you want sharp edges.
-
Let excess coating drip off before setting the bars on parchment.
-
Use good-quality chocolate for a smoother, more flavorful finish.
6. Ingredient Substitutions
| Original ingredient | Substitute |
|---|---|
| Unsalted butter | Salted butter, reducing the added salt |
| Semisweet chocolate | Dark chocolate or milk chocolate |
| Brown sugar | Additional granulated sugar, although the texture may change |
| All-purpose flour | A suitable gluten-free baking flour blend |
| Vanilla extract | Vanilla bean paste |
| Coconut oil | Neutral vegetable oil |
| Instant coffee powder | Omit it if preferred |
| Eggs | A suitable commercial egg replacer, noting that the texture may differ |
For a gluten-free version, use a gluten-free flour blend designed for baking. For an egg-free version, choose a tested egg-free brownie formula rather than assuming a simple substitution will produce the same fudgy texture.
7. Delicious Recipe Variations
Double Chocolate Brownie Bars
Add ½ cup of chocolate chips to the brownie batter before baking. Use dark chocolate for the outer coating.
Salted Chocolate Brownie Bars
Sprinkle flaky sea salt over the chocolate coating before it sets. The salt balances the sweetness and intensifies the chocolate flavor.
Peanut Butter Chocolate Brownie Bars
Swirl 2–3 tablespoons of smooth peanut butter into the brownie batter before baking. You can also drizzle a little melted peanut butter over the finished bars.
Cookies and Cream Brownie Bars
Fold a few chopped chocolate sandwich cookies into the batter and sprinkle cookie crumbs over the wet chocolate coating.
Caramel Brownie Bars
Add a thin layer of thick caramel between the cooled brownies and chocolate coating, or drizzle caramel over the finished bars. Keep the caramel layer modest so the bars are easy to handle.
Almond Chocolate Brownie Bars
Add ¼ cup of chopped almonds to the batter or sprinkle toasted almond pieces over the coating.
Espresso Brownie Bars
Add 1 teaspoon of instant espresso powder to the dry ingredients for a deeper, coffee-enhanced chocolate flavor.
8. How to Make the Chocolate Coating Smooth and Glossy
A smooth coating makes homemade brownie bars look professional.
-
Chop the chocolate into small, similarly sized pieces.
-
Melt slowly using short microwave intervals or a double boiler.
-
Stir frequently to distribute the heat evenly.
-
Keep water and steam out of the chocolate, as moisture can cause it to seize.
-
Allow the chocolate to cool slightly before dipping.
-
Add a little oil if you want a thinner coating that is easier to dip.
-
Tap the fork gently against the bowl to remove excess chocolate.
-
Allow the coating to set without disturbing the bars.
Important: Chocolate mixed with oil will set, but it will not necessarily have the same crisp snap or room-temperature stability as properly tempered chocolate. For a professional finish, use chocolate suitable for coating or temper the chocolate according to its type.
9. Storage and Meal Prep
Room temperature: If the coating is made with ordinary chocolate and the kitchen is cool, the bars can generally be kept in an airtight container for 1–2 days. For longer storage, refrigeration is preferable.
Refrigerator: Store in an airtight container for up to 5–7 days for best quality. Separate layers with parchment paper to prevent sticking.
Freezer: Freeze the bars in a single layer until firm, then transfer them to a freezer-safe container. They are best used within 2–3 months.
Thawing: Thaw frozen bars in the refrigerator, ideally while still covered, to help minimize condensation.
Make-ahead tip: Bake the brownie base a day in advance, refrigerate it once cool, and coat the bars the following day.
Avoid leaving the bars in direct sunlight or a hot kitchen, as the chocolate coating can soften or melt.
10. Approximate Nutrition
Estimated nutrition per bar, assuming 12 bars and the listed ingredients:
| Nutrient | Approximate amount |
|---|---|
| Calories | 330–400 kcal |
| Protein | 4–6 g |
| Carbohydrates | 35–45 g |
| Fat | 19–25 g |
| Saturated fat | 10–15 g |
| Fiber | 2–4 g |
| Sugar | 25–35 g |
| Sodium | 80–160 mg |
Values vary with the chocolate type, coating thickness, and exact portion size. These figures are estimates, not laboratory-tested nutritional values.
11. How to Make a Lighter Version
If you prefer a less rich dessert, you can make a few adjustments:
-
Cut the bars into 16 smaller portions instead of 12.
-
Use a thinner chocolate coating.
-
Choose semisweet or dark chocolate rather than a sweeter milk chocolate coating.
-
Reduce the optional toppings.
-
Use smaller amounts of butter and sugar only if following a tested brownie recipe designed for those changes.
Reducing butter or sugar too much can affect the fudgy texture, so it is better to adjust portion size and coating thickness first.
12. Frequently Asked Questions
Q1: Why are my brownies cakey instead of fudgy?
Too much flour, overmixing, or overbaking can create a cake-like texture. Measure accurately, fold gently, and remove the brownies when a toothpick shows moist crumbs rather than wet batter.
Q2: Why does the chocolate coating crack?
A thick coating, a very cold brownie center, or sudden temperature changes can contribute to cracking. Allow the brownies to cool completely and let the melted chocolate cool slightly before dipping.
Q3: Can I use chocolate chips for the coating?
Yes. Chocolate chips work, although some varieties contain stabilizers that make the coating thicker. A small amount of neutral oil can improve the dipping consistency.
Q4: Do I need to refrigerate the brownie bars?
Refrigeration is helpful for setting the coating and extending storage life. If the kitchen is warm, keep the bars refrigerated.
Q5: Can I make these bars without coconut oil?
Yes. Omit it for a thicker coating or use a little neutral vegetable oil. The texture and setting behavior will vary.
Q6: How do I cut clean brownie bars?
Cool the brownie slab completely, chill it briefly, and use a sharp knife. Clean and dry the blade between cuts.
Q7: Can I use boxed brownie mix?
Yes. Prepare the mix according to its package instructions, bake it in a suitable square pan, cool it completely, and then cut and coat the bars.
Q8: Can I make these brownie bars ahead for a party?
Yes. Make them one or two days ahead and refrigerate them in a sealed container. Bring them out shortly before serving so the brownie center softens slightly.
Q9: Why is my chocolate coating too thick?
The chocolate may be too cool or the chocolate type may naturally be thick. Warm it gently and stir in a small amount of oil if appropriate.
Q10: Can I add nuts to the brownie batter?
Yes. Fold in approximately ¼ cup of chopped walnuts, pecans, or almonds before baking.
Q11: Can I use white chocolate for the coating?
Yes. White chocolate creates a sweeter coating. Melt it gently because it is sensitive to overheating, and use a white chocolate product suitable for melting.
Q12: How do I prevent condensation on the coating?
Let the bars cool and set before covering them. When thawing frozen bars, allow them to warm gradually while covered to reduce condensation forming on the chocolate.
13. Troubleshooting Guide
| Problem | Likely cause | Solution |
|---|---|---|
| Brownies are dry | Overbaking or excess flour | Check earlier and measure ingredients carefully |
| Center is raw | Underbaking | Bake longer in short intervals |
| Chocolate coating is lumpy | Uneven melting or moisture | Melt slowly and keep utensils dry |
| Coating slides off | Brownies are warm or moist | Cool and chill the brownie base before dipping |
| Bars crumble when cut | Brownies are too warm or overbaked | Cool completely and chill before slicing |
| Chocolate sets too quickly | Coating has cooled too much | Warm gently and stir before continuing |
| Coating looks dull | Chocolate was overheated or not tempered | Melt carefully or temper suitable chocolate |
| Bars are too sweet | Sweet coating and sweet brownie base | Use dark chocolate and reduce the coating thickness |
14. Chef’s Tips for the Best Results
-
Use room-temperature eggs for easier mixing.
-
Melt the butter and chocolate gently to avoid scorching.
-
Whisk the eggs and sugar thoroughly for a glossy brownie surface.
-
Avoid overmixing once the flour is added.
-
Bake in the center of the oven for more even heat.
-
Let the brownie base cool completely before cutting.
-
Chill the bars briefly before dipping for easier handling.
-
Use a deep, narrow bowl for the chocolate coating to make dipping easier.
-
Tap off excess chocolate to prevent thick puddles around the base.
-
Add toppings while the coating is still wet.
-
Allow the chocolate to set fully before packaging.
-
Use parchment paper between layers when storing the bars.
15. Serving and Presentation Ideas
For a bakery-style presentation, place the bars in individual paper liners and arrange them on a serving tray.
For a party dessert platter, combine dark chocolate-coated bars with white chocolate-drizzled bars and a few pieces finished with flaky sea salt.
For a coffee break, serve one brownie bar with espresso or a cup of coffee.
For a holiday dessert table, add a fine white chocolate drizzle and a few crushed nuts.
For gifting, place fully set bars in a parchment-lined box, separating each layer to protect the coating.
16. Final Recipe Notes
Chocolate-Covered Brownie Bars combine the rich, fudgy texture of homemade brownies with the satisfying finish of a smooth chocolate shell. The most important steps are avoiding overbaking, cooling the brownie base completely, and melting the coating gently.