
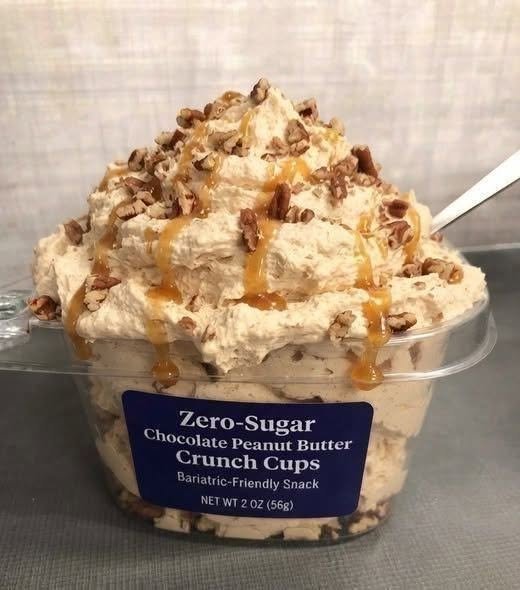
These High-Protein Zero-Sugar Chocolate Peanut Butter Crunch Cups are a delicious, guilt-free treat for chocolate and peanut butter lovers! Made with sugar-free chocolate, creamy peanut butter, protein powder, and crispy cereal, these little cups deliver a satisfying crunch with a rich, chocolatey flavor.
They’re perfect for healthy snacking, meal prep, post-workout treats, or when you’re craving something sweet without added sugar.
Preparation Time: 15 minutes
Chilling Time: 45–60 minutes
Total Time: 1 hour
Servings: 12 cups
Course: Healthy Dessert / Snack
Diet: High-Protein, No Added Sugar
Ingredients
For the Chocolate Base
-
1½ cups (250 g) sugar-free dark chocolate chips
-
1 tablespoon coconut oil
-
1 tablespoon unsweetened cocoa powder
-
½ teaspoon vanilla extract
For the Peanut Butter Protein Filling
-
½ cup (125 g) natural creamy peanut butter, unsweetened
-
½ cup vanilla protein powder (approximately 45–50 g)
-
3 tablespoons powdered erythritol or another zero-calorie sweetener
-
2 tablespoons unsweetened almond milk
-
½ teaspoon vanilla extract
-
A small pinch of salt
For the Crunch Layer
-
½ cup crispy rice cereal, unsweetened
-
2 tablespoons chopped roasted peanuts
-
1 tablespoon sugar-free chocolate chips (optional)
For Garnishing
-
2 tablespoons melted sugar-free chocolate
-
1 tablespoon chopped roasted peanuts
-
A small pinch of flaky sea salt
Instructions
Step 1: Prepare the Muffin Tray
-
Take a standard 12-cup mini muffin tray.
-
Line each cavity with small paper or silicone muffin liners.
-
Set the tray aside while preparing the chocolate and peanut butter mixture.
Step 2: Melt the Chocolate
-
Add the sugar-free dark chocolate chips to a microwave-safe bowl.
-
Add coconut oil.
-
Microwave in 20–30-second intervals, stirring between each interval until completely smooth.
-
Add unsweetened cocoa powder and vanilla extract.
-
Stir until everything is well combined and glossy.
-
Avoid overheating the chocolate because it can become thick or grainy.
Step 3: Create the Chocolate Base
-
Spoon approximately 1 tablespoon of melted chocolate into each muffin liner.
-
Gently spread the chocolate across the bottom of each liner.
-
Use the back of a small spoon to push some chocolate slightly up the sides.
-
Place the tray in the refrigerator for 10–15 minutes until the chocolate becomes firm.
Step 4: Prepare the Peanut Butter Protein Filling
-
Add natural peanut butter to a medium mixing bowl.
-
Add vanilla protein powder.
-
Add powdered erythritol and a pinch of salt.
-
Pour in almond milk and vanilla extract.
-
Mix everything using a spatula until a thick, smooth mixture forms.
-
If the mixture is too thick, add almond milk 1 teaspoon at a time.
-
If it feels too soft, add a little more protein powder.
Step 5: Add the Crunch
-
Add crispy rice cereal to the peanut butter protein mixture.
-
Add chopped roasted peanuts.
-
Gently fold everything together using a spatula.
-
Mix carefully so the cereal stays crispy.
-
Make sure the crunchy ingredients are evenly distributed throughout the filling.
Step 6: Fill the Chocolate Cups
-
Remove the muffin tray from the refrigerator.
-
Take a small amount of the peanut butter protein mixture.
-
Gently roll it into a small ball or flatten it into a disc.
-
Place the filling into the center of each chocolate cup.
-
Lightly press the filling down with the back of a spoon.
-
Leave a little space around the edges for the top chocolate layer.
Step 7: Add the Chocolate Top Layer
-
Reheat the remaining melted chocolate if necessary.
-
Spoon the chocolate over each peanut butter filling.
-
Spread gently until the filling is completely covered.
-
Tap the muffin tray lightly against the counter to help the chocolate settle evenly.
Step 8: Garnish and Chill
-
Sprinkle chopped roasted peanuts over each cup.
-
Add a tiny pinch of flaky sea salt if desired.
-
Drizzle a little extra melted sugar-free chocolate over the tops.
-
Place the tray in the refrigerator for 30–45 minutes.
-
Allow the chocolate to become completely firm before removing the cups from their liners.
Step 9: Serve and Enjoy
-
Carefully remove the chocolate peanut butter cups from the muffin liners.
-
Arrange them on a serving plate.
-
Cut one cup in half to reveal the creamy peanut butter protein filling and crunchy center.
-
Serve chilled for the best texture and flavor.
Tips for the Best Chocolate Peanut Butter Crunch Cups
-
Use smooth peanut butter: Natural creamy peanut butter creates a rich filling.
-
Choose a good protein powder: Vanilla or chocolate protein powder works well.
-
Keep the cereal crunchy: Fold it in gently just before assembling.
-
Use sugar-free chocolate: Check the label for added sugars.
-
Don’t overheat chocolate: Melt slowly for a smooth, glossy finish.
-
Chill completely: Allow enough time for the cups to set properly.
Frequently Asked Questions (Q&A)
Q1: Are these chocolate peanut butter cups completely sugar-free?
They can be made with no added sugar by choosing unsweetened peanut butter, sugar-free chocolate, unsweetened cereal, and a suitable zero-sugar sweetener. Check all ingredient labels because some protein powders and cereals contain added sugars.
Q2: Can I use chocolate protein powder instead of vanilla?
Yes! Chocolate protein powder gives the peanut butter filling an even richer chocolate flavor.
Q3: Can I make these cups without protein powder?
Yes, but they will have less protein. You can use powdered peanut butter or additional finely ground peanuts, adjusting the liquid as needed.
Q4: How much protein does each cup contain?
The estimated protein content is approximately 6–9 grams per cup, depending on the protein powder, chocolate, peanut butter, and cereal used.
Q5: Can I use crunchy peanut butter?
Absolutely! Crunchy peanut butter adds even more texture and complements the crispy rice cereal.
Q6: How long do these cups last?
Store them in an airtight container in the refrigerator for approximately 1–2 weeks.
Q7: Can I freeze these chocolate cups?
Yes! Place them in a freezer-safe container and freeze for up to 2 months. Let them sit at room temperature for a few minutes before eating.
Q8: Can I make these dairy-free?
Yes! Use dairy-free protein powder, dairy-free sugar-free chocolate, and unsweetened almond milk.
Nutritional Information (Estimated)
Per cup, based on 12 servings. Actual values vary by brand and ingredients.
| Nutrient | Amount |
|---|---|
| Calories | 170–190 kcal |
| Protein | 6–9 g |
| Carbohydrates | 10–13 g |
| Fat | 13–15 g |
| Fiber | 2–3 g |
| Added sugar | 0 g* |
Assumes all ingredients are genuinely free of added sugar.
Serving Suggestions
-
A glass of unsweetened almond milk.
-
Fresh strawberries or raspberries.
-
Greek yogurt.
-
A cup of black coffee.
-
A protein smoothie.
Enjoy these rich, crunchy, chocolatey, and protein-packed peanut butter cups without added sugar! 🍫🥜❤️