
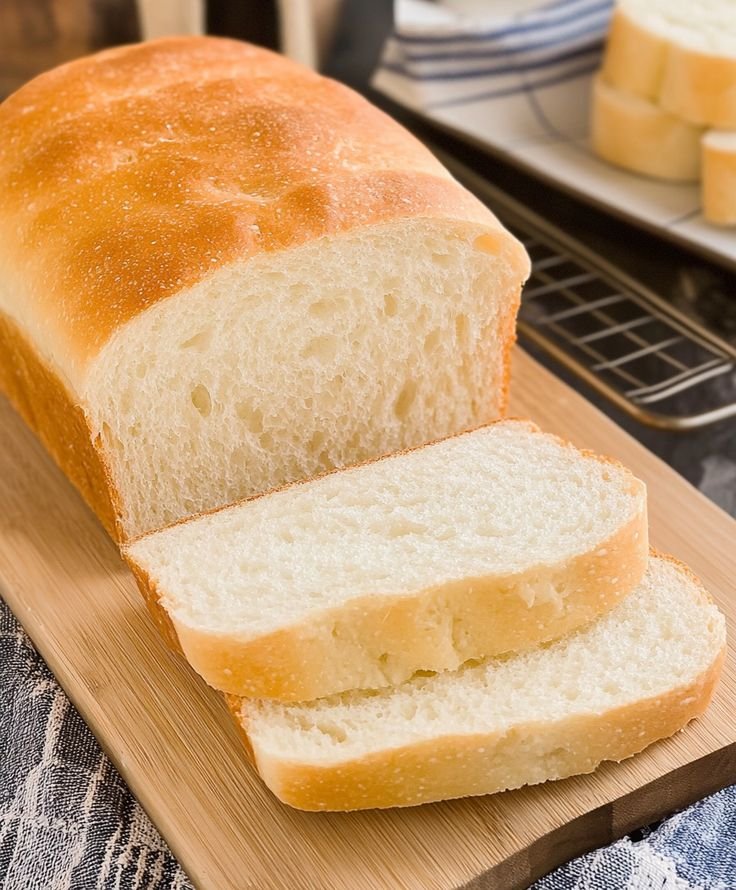
A classic soft, fluffy, tender white sandwich bread with a lightly golden crust and a pillowy interior. This recipe is simple enough for beginners and works beautifully for sandwiches, toast, French toast, or simply spreading with butter.
⭐ Recipe at a Glance
| Details | Information |
|---|---|
| Recipe | Soft & Fluffy Homemade White Bread |
| Prep Time | 20 minutes |
| First Rise | 1–1½ hours |
| Second Rise | 30–45 minutes |
| Bake Time | 25–30 minutes |
| Total Time | About 2½–3 hours |
| Servings | 1 loaf / about 12 slices |
| Difficulty | Easy–Moderate |
| Method | Oven-baked |
| Texture | Soft, fluffy & tender |
| Crust | Lightly golden & delicate |
🛒 Ingredients
For the Bread
- 3 cups (360 g) all-purpose flour
- 2¼ teaspoons (7 g) active dry yeast
- 2 tablespoons granulated sugar
- 1 teaspoon salt
- 1 cup (240 ml) warm milk
- 2 tablespoons unsalted butter, melted
- 1 large egg, room temperature
- 1 tablespoon honey, optional
- 1–2 teaspoons melted butter for brushing the finished loaf
🌡️ Important
The milk should be warm, not hot—roughly 100–110°F (38–43°C).
Very hot liquid can damage the yeast.
👩🍳 Step-by-Step Instructions
1. Activate the Yeast
Pour the warm milk into a large mixing bowl.
Add:
- Yeast
- Sugar
Stir gently and allow it to stand for 5–10 minutes.
The mixture should become slightly foamy.
If using instant yeast, you can skip this activation step and mix it directly with the flour.
2. Add the Wet Ingredients
Add:
- Melted butter
- Egg
- Honey, if using
Whisk until everything is combined.
3. Add the Flour and Salt
Add about 2½ cups of the flour along with the salt.
Mix using a wooden spoon or sturdy spatula.
Gradually add the remaining flour until a soft dough begins to form.
Important:
Don’t automatically add all the flour.
The exact amount can vary depending on humidity, flour, and measuring technique.
The dough should be:
- Soft
- Slightly tacky
- Elastic
- Not extremely sticky
👐 4. Knead the Dough
Transfer the dough to a lightly floured surface.
Knead for approximately 8–10 minutes by hand.
Push the dough forward with the heel of your hand, fold it back, rotate it, and repeat.
What you’re looking for:
The dough should become:
- Smooth
- Elastic
- Soft
- Less sticky
Windowpane Test
Take a small piece of dough and gently stretch it.
If it can stretch into a thin membrane without immediately tearing, the gluten has developed sufficiently.
🥣 5. First Rise
Place the dough into a lightly greased bowl.
Turn it once so the surface is lightly coated.
Cover with plastic wrap or a clean kitchen towel.
Place it somewhere warm.
Let it rise for approximately 1–1½ hours, or until it has roughly doubled in size.
Don’t rely only on the clock.
The dough may rise faster or slower depending on room temperature.
👊 6. Punch Down the Dough
Once doubled, gently press the dough down to release excess gas.
Don’t aggressively knead it at this stage.
Turn it onto your work surface.
🍞 7. Shape the Loaf
Flatten the dough gently into a rectangle.
Fold the sides toward the center.
Then roll the dough tightly from one short end to the other.
Pinch the seam closed.
Place the shaped dough seam-side down into a greased 9 × 5-inch loaf pan.
⏰ 8. Second Rise
Cover loosely with a clean towel.
Let the loaf rise for approximately 30–45 minutes.
The dough should become visibly puffy and rise close to or slightly above the edge of the pan.
Don’t overproof.
If the dough rises excessively, it may collapse during baking.
🔥 9. Preheat the Oven
Preheat your oven to:
350°F (175°C)
Allow the oven to fully preheat before baking.
🥚 10. Optional Egg Wash
For a shinier, darker crust, lightly brush the top with:
- 1 tablespoon milk + 1 tablespoon beaten egg
For a softer, more delicate crust, simply leave it unwashed.
🔥 11. Bake
Place the loaf in the center of the oven.
Bake for approximately 25–30 minutes.
The top should be beautifully golden.
If the top becomes brown too quickly, loosely cover it with aluminum foil for the remaining baking time.
🧈 12. Make the Crust Soft
As soon as the bread comes out of the oven, brush the top lightly with melted butter.
This helps create that characteristic soft homemade-bread crust.
❄️ 13. Cool Before Slicing
Allow the loaf to cool in the pan for about 10 minutes.
Then remove it from the pan and place it on a wire rack.
Allow it to cool for at least 45–60 minutes before slicing.
Why?
Cutting bread while it’s extremely hot can compress the soft interior and make it seem gummy.
🍞 What Makes This Bread So Soft?
Several ingredients contribute to the texture:
🥛 Milk
Milk gives the bread a tender crumb and richer flavor.
🧈 Butter
Butter adds softness and richness.
🥚 Egg
Egg contributes to tenderness, structure, and color.
🍯 Honey/Sugar
A small amount of sugar helps with browning and contributes to a tender texture.
🌾 Proper Kneading
Good gluten development creates the fluffy structure that holds the air produced by the yeast.
⭐ The Secret to Extra-Fluffy Bread
For the softest loaf possible:
- Don’t use excessive flour.
- Knead until the dough becomes elastic.
- Give the dough enough time to rise.
- Don’t overproof.
- Don’t overbake.
- Brush the hot loaf with butter.
- Cool completely before slicing.
The biggest mistake is usually adding too much flour.
A slightly tacky dough often produces a softer loaf than a stiff, heavily floured dough.
🥪 How to Serve
This bread is perfect for:
- Peanut butter sandwiches
- Turkey sandwiches
- Grilled cheese
- Toast
- Egg sandwiches
- French toast
- Breakfast sandwiches
- Bread pudding
- Butter and jam
- Avocado toast
- Soup and sandwiches
🧊 Storage
Once completely cool, place the bread in an airtight bag or container.
Room Temperature
Best consumed within 2–3 days for maximum freshness.
Refrigerator
Can be refrigerated, but refrigeration can make bread stale faster.
Freezer
For longer storage, slice the bread and freeze it in an airtight freezer bag.
It can generally be kept frozen for approximately 2–3 months for best quality.
❄️ Freezing Instructions
For convenient storage:
- Allow the loaf to cool completely.
- Slice it.
- Place parchment paper between slices if desired.
- Put the slices into a freezer-safe bag.
- Remove excess air.
- Freeze.
Take out individual slices whenever needed and toast them directly from frozen.
🔄 Delicious Variations
🧄 Garlic Butter Bread
Add ½–1 teaspoon garlic powder to the dough.
Brush the baked loaf with garlic butter.
🌿 Herb White Bread
Add:
- 1 teaspoon dried Italian herbs
- ½ teaspoon garlic powder
Excellent with soups and pasta.
🧀 Cheesy Bread
Add approximately ½ cup shredded cheddar or mozzarella to the dough.
🍯 Honey White Bread
Replace the sugar with 2–3 tablespoons honey for a slightly sweeter loaf.
🌾 Soft Whole-Wheat Version
Replace up to 1 cup of the all-purpose flour with whole-wheat flour.
You may need a little additional liquid.
Avoid replacing all the flour if your goal is an especially light and fluffy loaf.
🌱 Dairy-Free Version
Replace the milk with:
- Unsweetened oat milk
- Unsweetened soy milk
- Unsweetened almond milk
Replace butter with a dairy-free butter alternative or neutral oil.
🥚 Egg-Free Version
Replace the egg with approximately:
- 3 tablespoons additional milk
The loaf will still work, although the texture and richness will be slightly different.
📊 Approximate Nutrition
For the basic recipe divided into approximately 12 slices:
- Calories: ~155–175 per slice
- Protein: ~4–5 g
- Carbohydrates: ~25–28 g
- Fat: ~4–5 g
- Fiber: ~1 g
- Sugar: ~2–3 g
Nutrition varies according to the exact flour, milk, butter, egg, and slice size used.
❓ Frequently Asked Questions
1. Why didn’t my bread rise?
Common reasons include:
- Yeast was old or inactive.
- Milk was too hot.
- Room temperature was too cold.
- Too much flour was added.
- The dough wasn’t kneaded sufficiently.
Give the dough plenty of time in a warm, draft-free location.
2. Can I use instant yeast?
Yes.
Use 2¼ teaspoons instant yeast.
You can mix it directly with the dry ingredients without activating it first.
3. Can I use active dry yeast?
Yes. That’s what the recipe is written for.
Activating it in warm milk first is a good way to check that the yeast is active.
4. Why is my bread dense?
Dense bread can result from:
- Too much flour
- Insufficient kneading
- Underproofing
- Inactive yeast
- Cutting the bread before it cooled
A soft, slightly tacky dough usually produces better results.
5. Why did my bread collapse?
The dough may have been overproofed.
Another possibility is that the bread wasn’t baked long enough to establish sufficient structure.
6. Can I make this without an egg?
Yes.
Use approximately 3 tablespoons additional milk.
7. Can I replace milk with water?
Yes, but milk produces a softer, richer loaf.
If using water, consider adding an additional tablespoon of butter or oil.
8. Why is the crust hard?
The bread may have been baked too long.
Brushing the hot loaf with butter also helps soften the crust.
9. How do I get a very soft crust?
As soon as the bread comes out of the oven, brush the top with melted butter and cover loosely with a clean towel while it cools.
10. How do I know when it’s fully baked?
The loaf should be golden brown and sound hollow when tapped.
For the most reliable result, the center should reach approximately 190–200°F (88–93°C).
11. Can I make the dough in a stand mixer?
Absolutely.
Use the dough hook:
- Mix ingredients on low speed.
- Knead on medium-low for approximately 6–8 minutes.
- Continue until the dough is smooth and elastic.
12. Can I make this bread in a bread machine?
Yes.
Add the ingredients according to your bread machine manufacturer’s recommended order and use a basic/white bread setting.
13. Can I make dinner rolls from this dough?
Yes.
Instead of placing the entire dough into a loaf pan, divide it into 10–12 equal pieces.
Shape into balls and place in a greased baking dish.
Allow them to rise and bake until golden.
14. Can I make this recipe sweeter?
Yes.
Add another tablespoon of sugar or honey for a slightly sweeter sandwich bread.
15. Can I use bread flour?
Yes.
Bread flour can produce a slightly chewier loaf because of its higher protein content.
You may need a small adjustment in liquid.
🛠️ Troubleshooting
| Problem | Likely Cause | Solution |
|---|---|---|
| Dough extremely sticky | Too much liquid | Add flour 1 tablespoon at a time |
| Dough very dry | Too much flour | Add milk 1 teaspoon at a time |
| Bread didn’t rise | Inactive yeast | Check yeast freshness |
| Dense loaf | Underproofed/too much flour | Allow proper rising and avoid excess flour |
| Bread collapsed | Overproofing | Shorten second rise |
| Hard crust | Overbaking | Reduce baking time slightly |
| Gummy center | Underbaking/sliced hot | Bake thoroughly and cool completely |
| Uneven holes | Poor shaping | Roll dough tightly and evenly |
| Pale crust | Low oven temperature | Ensure oven is fully preheated |
| Bread dries quickly | Overbaking | Don’t bake longer than necessary |
👩🍳 Pro Tips for Bakery-Style Results
Tip 1: Weigh the flour
A kitchen scale is much more accurate than measuring flour by cups.
Tip 2: Don’t drown the dough in flour
The dough should remain soft.
Tip 3: Watch the dough, not the clock
Rise times depend heavily on room temperature.
Tip 4: Don’t rush the first rise
Proper fermentation develops both texture and flavor.
Tip 5: Shape tightly
A properly shaped loaf gives you a more even crumb.
Tip 6: Don’t overproof
The dough should be puffy, not fragile and collapsing.
Tip 7: Don’t overbake
Overbaking is one of the easiest ways to lose that soft texture.
Tip 8: Butter after baking
This is one of the easiest ways to get a soft, delicious crust.
🏆 Why You’ll Love This Recipe
✅ Soft and fluffy interior
✅ Tender golden crust
✅ Simple pantry ingredients
✅ No complicated equipment required
✅ Great for sandwiches and toast
✅ Freezer-friendly
✅ Customizable
✅ Beginner-friendly
✅ Delicious fresh from the oven
🍞 Final Result
You should end up with a tall, soft, fluffy loaf with a tender crumb and lightly golden crust. Let it cool completely before slicing so you get clean slices without compressing the beautiful fluffy interior.