
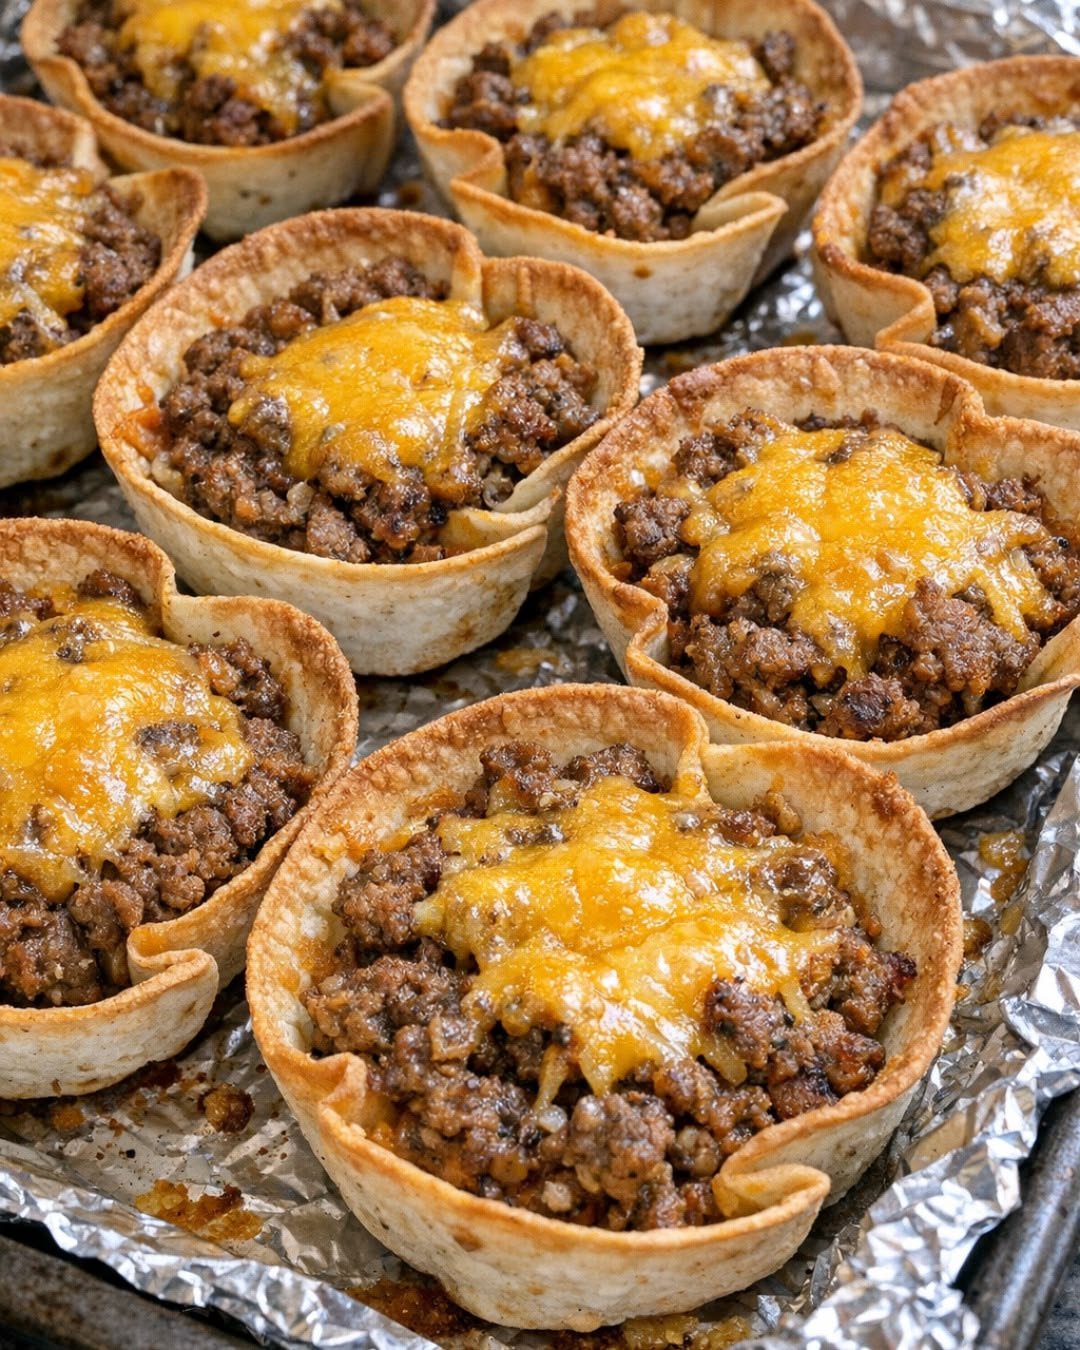
These 4-Ingredient Taco Cups are crispy, cheesy, savory, and incredibly easy to make. They’re perfect for busy weeknights, parties, game days, lunchboxes, appetizers, or a quick family dinner.
Using just four main ingredients, you can create individual taco cups with a crunchy shell, seasoned beef, melted cheese, and your favorite toppings.
Recipe at a Glance
| Details | Information |
|---|---|
| Recipe | 4-Ingredient Taco Cups |
| Prep Time | 10 minutes |
| Cook Time | 12–15 minutes |
| Total Time | About 25 minutes |
| Servings | 12 taco cups |
| Difficulty | Very Easy |
| Course | Appetizer / Main Course |
| Cuisine | Mexican-inspired |
| Method | Oven-Baked |
| Texture | Crispy outside, juicy & cheesy inside |
| Flavor | Savory, cheesy, mildly spicy |
The 4 Main Ingredients
- 12 small flour or corn tortillas
- 1 lb (450 g) lean ground beef
- 1 packet taco seasoning
- 1½ cups shredded Mexican-blend cheese
Optional Toppings
These aren’t required for the basic 4-ingredient recipe:
- Diced tomatoes
- Shredded lettuce
- Sour cream
- Salsa
- Guacamole
- Jalapeños
- Green onions
- Fresh cilantro
- Diced avocado
- Lime wedges
Step-by-Step Instructions
1. Preheat the Oven
Preheat your oven to:
375°F (190°C)
Lightly grease a 12-cup muffin tin.
This helps the tortilla cups brown evenly and release easily.
2. Cook the Beef
Place a large skillet over medium-high heat.
Add the ground beef.
Cook for approximately 6–8 minutes, breaking it apart with a wooden spoon as it cooks.
Continue until the beef is completely browned.
3. Drain Excess Fat
If there is excess grease in the skillet, carefully drain it.
Return the beef to the pan.
4. Add Taco Seasoning
Add the taco seasoning according to the packet instructions.
If your seasoning requires water, add the recommended amount.
Stir well.
Simmer for approximately 2–3 minutes, until the seasoning is evenly distributed and the beef is flavorful.
Remove from heat.
5. Prepare the Tortillas
If the tortillas are stiff, warm them for approximately 10–15 seconds in the microwave.
This makes them easier to shape without cracking.
6. Form the Taco Cups
Press one tortilla into each muffin cup.
Gently fold the edges so the tortilla forms a small cup.
Don’t worry if the edges overlap or create little folds.
The folds become crispy and attractive during baking.
7. Add the Beef
Divide the seasoned beef evenly among the tortilla cups.
Use approximately 2–3 tablespoons per cup.
Don’t overfill them.
8. Add Cheese
Sprinkle shredded cheese generously over each taco cup.
The cheese will melt over the beef and help hold everything together.
9. Bake
Place the muffin tin in the preheated oven.
Bake for approximately:
12–15 minutes
The taco cups are ready when:
- The tortilla edges are golden brown.
- The cheese is completely melted.
- The cups feel crisp around the edges.
10. Cool Briefly
Remove the muffin tin from the oven.
Allow the taco cups to cool for approximately:
3–5 minutes
This makes them easier to remove.
11. Remove From the Pan
Use a small spoon or butter knife to gently loosen the edges.
Lift each taco cup out carefully.
12. Add Toppings
Top with your favorites.
Try:
Salsa + sour cream + tomatoes + cilantro
or
Guacamole + jalapeños + lime
Serve immediately.
What Do Taco Cups Taste Like?
These taco cups combine:
- Crispy tortilla
- Savory seasoned beef
- Melted cheese
- Classic taco spices
The outside becomes lightly crisp while the center remains juicy and cheesy.
They’re essentially a handheld, bite-sized taco with a crunchy cup shape.
The Secret to Perfect Taco Cups
1. Warm the tortillas
Cold tortillas can crack when pressed into the muffin tin.
2. Don’t overfill
Too much filling can make the tortilla soggy.
3. Use lean beef
It produces a less greasy filling.
4. Bake until golden
Don’t remove them too early or the tortilla won’t become crisp.
5. Let them cool briefly
A few minutes helps the cups firm up.
Corn Tortilla Version
Corn tortillas give the taco cups a more traditional taco flavor and a slightly crispier texture.
Warm them first so they become flexible.
If they are still cracking, lightly brush them with a tiny amount of oil before shaping.
Chicken Taco Cups
Replace ground beef with:
1 lb (450 g) ground chicken
Season with taco seasoning and cook exactly the same way.
Make sure the chicken reaches 165°F (74°C).
Turkey Taco Cups
Ground turkey is another excellent substitute.
Use lean ground turkey and season as directed.
Vegetarian Taco Cups
Replace the beef with:
- Black beans
- Pinto beans
- Refried beans
- Seasoned lentils
- Vegetarian taco meat
For a simple version, combine:
1½ cups black beans + taco seasoning + ½ cup salsa
and use that as the filling.
Chicken Fajita Taco Cups
Add sautéed:
- Bell peppers
- Onions
to cooked chicken.
Top with Mexican-blend cheese.
Taco Cup Breakfast Version
For a breakfast variation, fill the tortilla cups with:
- Scrambled eggs
- Cooked turkey sausage
- Cheese
Bake until the cheese melts.
Top with salsa.
Mini Taco Cups
Use smaller tortillas and a mini muffin tin.
These make excellent bite-sized appetizers.
Reduce the cooking time and watch the edges carefully.
Spicy Taco Cups
Add:
- Jalapeños
- Hot salsa
- Cayenne
- Red pepper flakes
- Pepper Jack cheese
For serious heat, add diced fresh jalapeño to the beef while cooking.
Cheesy Taco Cups
For extra cheese, use:
- Cheddar
- Monterey Jack
- Pepper Jack
- Mexican blend
- Colby Jack
You can also add a small amount of cheese beneath the beef and another layer on top.
Loaded Taco Cups
After baking, top with:
- Lettuce
- Tomato
- Avocado
- Sour cream
- Salsa
- Green onions
- Cilantro
These become miniature loaded tacos.
Low-Carb Version
Traditional tortillas are the main source of carbohydrates.
For a lower-carb variation, use low-carb tortillas.
Keep the filling focused on:
- Lean beef
- Cheese
- Lettuce
- Salsa
- Avocado
High-Protein Version
Use:
- Extra-lean ground beef
- Lean ground turkey
- Ground chicken
- Reduced-fat cheese
Add a spoonful of Greek yogurt instead of sour cream.
WW-Friendly Version
For a lighter version:
- Use lean ground turkey or extra-lean beef.
- Choose low-carb or reduced-calorie tortillas.
- Use reduced-fat cheese.
- Add plenty of zero-point vegetables such as lettuce and tomatoes.
- Use fat-free Greek yogurt instead of sour cream.
WW Points depend on your current plan and exact ingredients, so calculate using the brands and quantities you use.
Gluten-Free Version
Use certified gluten-free corn tortillas and verify that the taco seasoning is gluten-free.
The beef and cheese are naturally gluten-free in their basic forms.
Dairy-Free Version
Use a dairy-free shredded cheese alternative.
Or simply omit the cheese and add avocado or guacamole for richness.
Make-Ahead Instructions
Prepare the seasoned beef up to:
2 days ahead
Store it in an airtight container in the refrigerator.
When ready to make the taco cups:
- Warm the beef.
- Shape the tortillas.
- Add beef.
- Add cheese.
- Bake fresh.
For the crispiest result, don’t assemble the tortilla cups too far in advance.
Storage
Store leftover taco cups in an airtight container in the refrigerator.
Best eaten within:
3 days
Keep toppings such as lettuce, salsa, and sour cream separate.
Reheating
Oven
Place taco cups on a baking sheet.
Reheat at:
375°F (190°C)
for approximately 5–8 minutes.
Air Fryer
Air fry at:
350°F (175°C)
for approximately 3–5 minutes.
This is one of the best methods for restoring crispiness.
Microwave
Microwave for approximately 30–60 seconds.
The filling will warm quickly, but the tortilla will become softer.
Freezing
Taco cups can be frozen, although the tortilla texture may soften slightly.
Allow them to cool completely.
Wrap individually and place in a freezer-safe container.
Freeze for up to approximately:
2 months
Reheat directly from frozen in the oven or air fryer until hot throughout.
Approximate Nutrition
For 1 of 12 taco cups, using lean ground beef, flour tortillas, and regular Mexican-blend cheese:
- Calories: approximately 180–210
- Protein: approximately 11–13 g
- Carbohydrates: approximately 13–16 g
- Fat: approximately 8–10 g
- Fiber: approximately 1–2 g
- Sugar: approximately 1–2 g
Actual nutrition depends on tortilla size, beef percentage, cheese, and toppings.
Frequently Asked Questions
1. Can I use flour tortillas?
Yes. Small flour tortillas work particularly well.
2. Can I use corn tortillas?
Yes. They provide a more traditional taco flavor and can become especially crispy.
3. Why are my tortillas cracking?
They are probably too cold or stiff.
Warm them briefly before shaping.
4. Can I use ground turkey?
Absolutely.
Ground turkey is an excellent lighter alternative.
5. Can I use chicken?
Yes.
Ground chicken or finely chopped cooked chicken both work.
6. Can I make these vegetarian?
Yes.
Use black beans, refried beans, lentils, or vegetarian taco meat.
7. Can I use leftover taco meat?
Yes.
This is a great way to repurpose leftover taco filling.
8. Can I make these ahead?
Yes.
Cook the meat ahead, but assemble and bake the cups close to serving time for the best crispness.
9. Can I freeze them?
Yes.
Freeze cooled taco cups in an airtight container.
10. Can I make them in a mini muffin tin?
Yes.
Use smaller tortillas and reduce the baking time.
11. Can I add beans?
Yes.
Black beans or pinto beans are excellent additions.
12. Can I add rice?
Yes, but don’t overfill the cups.
A small amount of cooked rice works well.
13. Can I add salsa before baking?
Yes, but use only a small amount because excess liquid can make the tortillas soggy.
14. Can I add sour cream before baking?
It’s better added after baking.
15. Can I use shredded chicken?
Yes.
Season cooked shredded chicken with taco seasoning and a small amount of salsa.
16. How do I make them extra crispy?
Brush the tortillas lightly with oil and bake until the edges are deeply golden.
An air fryer is also excellent for reheating them.
17. Why are the bottoms soggy?
The filling may contain too much liquid.
Drain the beef well and avoid adding watery salsa before baking.
18. Why did the cheese burn?
The oven may be running hot or the cups may have been baked too long.
Check them around the 10-minute mark.
19. Can I use different cheese?
Yes.
Cheddar, Monterey Jack, Pepper Jack, mozzarella, or Colby Jack all work.
20. Can I make these spicy?
Yes.
Add jalapeños, hot salsa, cayenne, or Pepper Jack cheese.
21. Can I use homemade taco seasoning?
Definitely.
A simple blend can include chili powder, cumin, paprika, garlic powder, onion powder, oregano, salt, and black pepper.
22. Are taco cups good for parties?
Yes.
They’re easy to serve and can be eaten without utensils.
23. Can kids help make them?
Yes.
Children can help add the cooked beef and cheese, while an adult handles the hot pan and oven.
24. Can I make them gluten-free?
Yes.
Use certified gluten-free corn tortillas and taco seasoning.
25. How do I remove them from the muffin tin?
Let them cool for 3–5 minutes, then gently loosen the edges with a small spoon or butter knife.
Troubleshooting Guide
| Problem | Likely Cause | Solution |
|---|---|---|
| Tortillas crack | Too cold | Warm before shaping |
| Cups are soggy | Too much liquid | Drain meat and limit wet toppings |
| Bottom isn’t crispy | Not baked long enough | Add 2–4 minutes |
| Edges burn | Oven too hot | Reduce temperature slightly |
| Cups fall apart | Overfilled | Use less filling |
| Cheese burns | Baked too long | Check earlier |
| Beef is greasy | Higher-fat beef | Use lean ground beef |
| Cups stick | Pan not greased | Lightly grease muffin tin |
| Filling is bland | Weak seasoning | Add taco seasoning to taste |
| Cups don’t hold shape | Tortillas too large | Use small tortillas and press firmly |
Chef’s Tips
Tip 1: Don’t skip warming the tortillas
It makes shaping dramatically easier.
Tip 2: Drain the beef well
Excess grease can make the bottoms soft.
Tip 3: Don’t add watery toppings before baking
Keep salsa, sour cream, and guacamole for serving.
Tip 4: Use freshly shredded cheese
It usually melts more smoothly than some pre-shredded varieties.
Tip 5: Leave some tortilla above the filling
Those exposed edges become beautifully crisp.
Tip 6: Rest before removing
A few minutes allows the cheese to set slightly and makes removal easier.
Tip 7: Serve immediately
Taco cups are at their crispiest straight from the oven.
Best Toppings
Create a taco bar with:
- Salsa
- Guacamole
- Sour cream
- Greek yogurt
- Diced tomatoes
- Lettuce
- Jalapeños
- Cilantro
- Green onions
- Avocado
- Lime
- Pickled onions
Let everyone customize their own taco cups.
Best Side Dishes
Serve with:
- Mexican rice
- Cilantro-lime rice
- Black beans
- Corn salad
- Guacamole
- Fresh salsa
- Green salad
- Roasted vegetables
- Refried beans
Party Serving Idea
For a party, arrange the taco cups on a large platter.
Place small bowls of:
Salsa | Sour Cream | Guacamole | Jalapeños | Tomatoes | Cilantro
in the center.
This turns the simple recipe into a fun DIY taco-cup bar.
Meal-Prep Idea
Prepare the beef mixture in advance and portion it into containers.
When you’re ready for dinner:
- Warm the beef.
- Assemble the tortilla cups.
- Add cheese.
- Bake.
- Add fresh toppings.
This makes an excellent quick weeknight meal.
Final Result
These 4-Ingredient Taco Cups are crispy, cheesy, savory, and incredibly easy to customize. The seasoned beef provides a juicy, flavorful filling while melted cheese creates a rich layer inside the golden tortilla shell.
They’re especially good for busy weeknight dinners, appetizers, game-day food, potlucks, and family taco nights—with minimal ingredients and very little cleanup.