
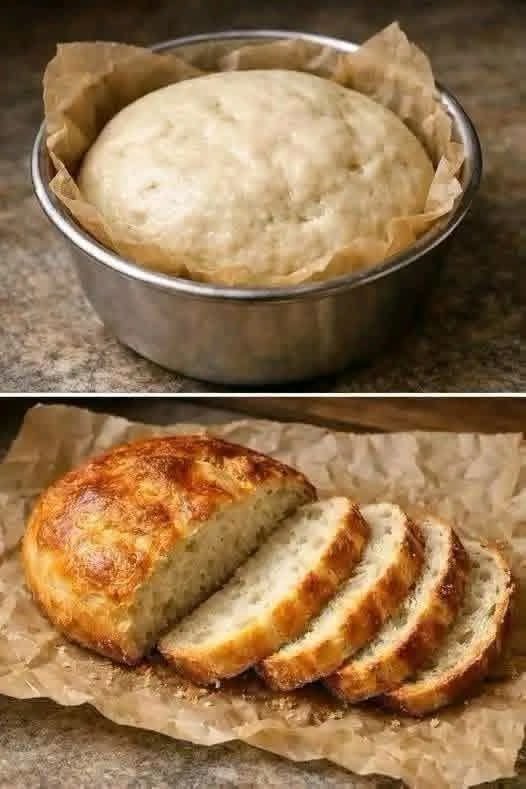
Ingredients
For the Bread
3 cups (375 g) all-purpose flour
1½ teaspoons salt
1 teaspoon instant yeast
1 teaspoon sugar or honey
1½ cups (360 ml) warm water
1 tablespoon olive oil or melted butter
For the Pot
Parchment paper
A little flour for dusting, if needed
Step-by-Step Method
Step 1: Combine the Dry Ingredients
Add the flour, salt, instant yeast, and sugar to a large mixing bowl.
Whisk or stir everything together so the yeast and salt are evenly distributed.
Tip: Keep the salt evenly mixed into the flour rather than placing a large amount directly on the yeast.
Step 2: Add the Water
Slowly pour in the warm water while mixing with a wooden spoon or spatula.
Add the olive oil and continue mixing until everything comes together.
The dough should look:
Soft
Sticky
Moist
Slightly shaggy
Don’t worry if it doesn’t look smooth at this stage.
Do not add lots of extra flour. A wetter dough helps create the soft interior and rustic texture seen in the finished bread.
Step 3: First Rise
Cover the bowl tightly with plastic wrap or a clean kitchen towel.
Leave it somewhere warm and draft-free for approximately 1½–2 hours.
The dough should become noticeably larger and bubbly.
Depending on room temperature, the rise can take a little longer.
How to know it’s ready:
The dough should be approximately double in size and have small bubbles visible on the surface.
Step 4: Shape the Dough
Lightly flour your work surface and your hands.
Carefully transfer the dough onto the surface.
Instead of kneading heavily, gently fold the dough:
Pull one side toward the center.
Fold the opposite side over it.
Fold the remaining sides toward the center.
Turn the dough over.
Gently shape it into a round loaf.
Try not to press all the air out of the dough.
Step 5: Prepare the Baking Pot
Take a small Dutch oven or oven-safe heavy pot.
Place a piece of parchment paper inside.
The parchment makes it easier to lift the finished bread out of the pot and also helps prevent sticking.
Place the shaped dough into the lined pot.
Cover it loosely and let it rest for another 30–45 minutes.
Step 6: Preheat the Oven
About 20–30 minutes before baking, preheat your oven to:
450°F / 230°C
If you’re using a Dutch oven, you can also preheat the empty Dutch oven according to its manufacturer’s instructions.
A very hot baking environment helps create the beautiful crust.
Step 7: Bake the Bread
Place the pot with the dough into the preheated oven.
Covered baking:
Bake for approximately 25 minutes with the lid on.
The covered environment traps steam, which helps the bread rise and develop a crisp crust.
Uncovered baking:
Remove the lid and continue baking for another 15–20 minutes.
Bake until the top becomes:
Deep golden brown
Crisp
Beautifully browned
If you prefer a lighter crust, remove it a few minutes earlier.
Step 8: Cool Completely
Carefully remove the bread from the pot.
Place it on a wire rack.
Allow it to cool for at least 20–30 minutes before slicing.
This step is important because the inside continues to set while cooling.
If you slice it immediately, the center can become gummy.
How to Get Beautiful Slices
Use a sharp serrated bread knife.
Place the loaf on its side and gently saw through the crust instead of pressing straight down.
This gives you cleaner slices without crushing the soft center.
Important Tips for Perfect Homemade Bread
1. Don’t use hot water
The water should feel warm, not hot. Very hot water can damage the yeast.
2. Don’t add too much flour
Sticky dough is normal for this style of bread.
3. Give it enough time to rise
If your kitchen is cool, the dough may need more than 2 hours.
4. Don’t skip the second rest
The short second rise helps create a lighter loaf.
5. Bake in a very hot oven
A properly preheated oven helps produce the crisp golden crust.
6. Don’t cut it while piping hot
Letting the loaf cool gives you a much better texture.
Overnight Version
For even more flavor, you can make the dough the night before.
After mixing the dough:
Cover the bowl tightly.
Place it in the refrigerator overnight.
The next day, take it out and let it sit at room temperature for about 30–60 minutes.
Shape it.
Let it rest.
Bake as directed.
The longer fermentation develops a deeper, more flavorful bread.
Flavor Variations
Garlic & Herb Bread
Add:
1 teaspoon garlic powder
1 teaspoon dried Italian herbs
1 tablespoon chopped fresh parsley
Cheesy Bread
Add:
½ cup shredded cheddar or mozzarella
¼ teaspoon garlic powder
Rosemary Bread
Add:
1 tablespoon fresh chopped rosemary
1 tablespoon olive oil
Cinnamon Raisin Bread
Add:
½ cup raisins
1 teaspoon cinnamon
2 tablespoons brown sugar
Nut Information
Basic recipe:
No nuts are required.
Allergens:
Wheat
Gluten
If you’re preparing this for someone with a nut allergy, check the labels of packaged ingredients for possible peanut/tree-nut cross-contamination.
For a nut-free version, use ingredients specifically labeled according to your allergy requirements.
Approximate Nutrition
Per 1 of 8 slices:
Calories: ~190 kcal
Protein: ~5 g
Carbohydrates: ~35 g
Fat: ~2 g
Saturated fat: ~0.3 g
Fiber: ~1–2 g
Sugar: ~1 g
Sodium: ~440 mg
Nutrition is an estimate and will vary depending on the exact flour, oil, salt, and serving size.
What to Serve With It
This bread is delicious with:
Salted butter
Honey
Strawberry or raspberry jam
Garlic butter
Cream cheese
Scrambled or fried eggs
Tomato soup
Creamy mushroom soup
Chicken soup
Beef or chicken stew
Storage
Room Temperature
Store the cooled bread in a paper bag or breathable bread bag for 2–3 days.
Refrigerator
Refrigeration can make bread stale faster, so it’s generally better to keep it at room temperature if you’ll eat it within a couple of days.
Freezer
Slice the bread and freeze the slices in an airtight freezer bag for up to 2–3 months.
Reheat individual slices in a toaster or oven.
Frequently Asked Questions
1. Why is my bread dense?
Usually this happens because the dough didn’t rise enough, the yeast wasn’t active, or too much flour was added.
2. Can I use active dry yeast?
Yes. Use approximately 1¼ teaspoons active dry yeast and dissolve it in the warm water before adding it to the flour.
3. Can I make this without a Dutch oven?
Yes. Use a heavy oven-safe pot with a lid. Alternatively, bake on a baking sheet and place a heatproof pan of hot water in the oven to create steam.
4. Why didn’t my crust become crispy?
Make sure the oven is fully preheated and bake uncovered for the final 15–20 minutes. Allow the bread to cool uncovered as well.
5. Can I use whole wheat flour?
Yes, but replacing all the flour with whole wheat can make the loaf heavier. For a lighter result, start by replacing ½–1 cup of the all-purpose flour with whole wheat flour.
6. Can I make the dough ahead of time?
Yes. The overnight refrigerator method works particularly well and can give the bread a deeper flavor.
7. Why is my dough so sticky?
That’s normal for no-knead bread. Avoid adding excessive flour because it can make the finished loaf heavy and dry.
8. How do I know when the bread is fully baked?
The crust should be deeply golden brown and firm. If you have an instant-read thermometer, the center should generally be around 200–210°F (93–99°C).
9. Can I add seeds?
Yes. You can add sunflower seeds, sesame seeds, pumpkin seeds, or flaxseed. If serving someone with a nut allergy, remember that seeds can still have cross-contact depending on the product.
10. Can I make smaller rolls instead?
Yes. Divide the dough into smaller portions, shape them into balls, allow them to rise, and reduce the baking time accordingly.